The 3 Cs Toolkit in Unity (2023)
Note: this blog post was presented as a talk at Unity NYC's March 2023 meetup.
Thomas Was Alone is a fantastic game.
It's a prime example of what you can achieve as a programmer — even if you have limited art skills.
However, there might come a point in your game dev journey when you no longer want to make boxes, snakes, and geometric shapes.
Instead, you want to create full-blown 3D characters that come to life with animation:
- Link, doing his spinny sword thing.
- Mario, jumping and somersaulting around in Super Mario 64. Or...
- Samus, running and strafing and morphing into a ball and firing all sorts of different projectiles.
Perhaps even an undead hero like in Dark Souls, where you could parry a skeleton's sword swing, and stab them in the back.
But how do you make that jump: from abstract shapes, to beautifully-animated characters in a 3D space?
Whereas 3D characters required a deep and expansive skillset in the past, these days you can get by with the help of some powerful tools.
Here, I'll show you!
In the rest of this blog post, I'll give you an overview of 3 modern Unity packages:
- Mecanim: for character animation,
- Cinemachine: for your game's camera, and
- Input System: for your controls.
I'll teach you their key mental models, and walk you through my simple character creation workflow that employs all 3 packages.
By the end of this post, you'll come away with a firm grasp of the character implementation process, and be empowered to create living and breathing characters of your own in Unity.
Let's get started. 👇
Agenda
🏭 1. Consider your animation workflow.
Photo by Anshita Nair on Unsplash
Behind every beautifully-animated character is a pipeline: a series of tasks that produce your character asset.
It's actually fairly involved:
And whether you're a solo developer or a small team, you must decide how you'll tackle each step of the process with your team's skillset.
Consider the countless workflow options that you can explore:
| Task | Options |
|---|---|
| Modeling |
|
| Texturing |
|
| Rigging |
|
| Skinning |
|
| Animation |
|
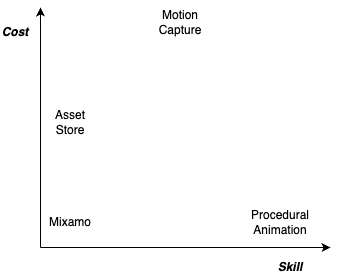
Within this space of options, you might compare options by evaluating monetary cost versus required skill:
You might evaluate expressiveness, or whether you can achieve your desired creative result.
For example, if you wanted to create a climbing animation, would you be able to do so with purchased animations alone?You might evaluate short-term versus long-term benefit. That is, do you want to reuse this workflow in future games? If so, is it worth spending more time learning the skillset now, versus later?
Lastly (and most importantly), you might evaluate scope, or how long it takes to perform your selected workflow, and whether that scope is acceptable for your time and budget.
For example, procedural animation is insanely cool. But you need to be good at math. And doesn't traditional animation give you (more or less) the same result?Ultimately, your workflow decision depends on all the factors above.
💰 2. What to do if you can't model or animate.
Given the considerations above, I knew I couldn't create 3D models and animations myself. At least not within a reasonable timeframe.
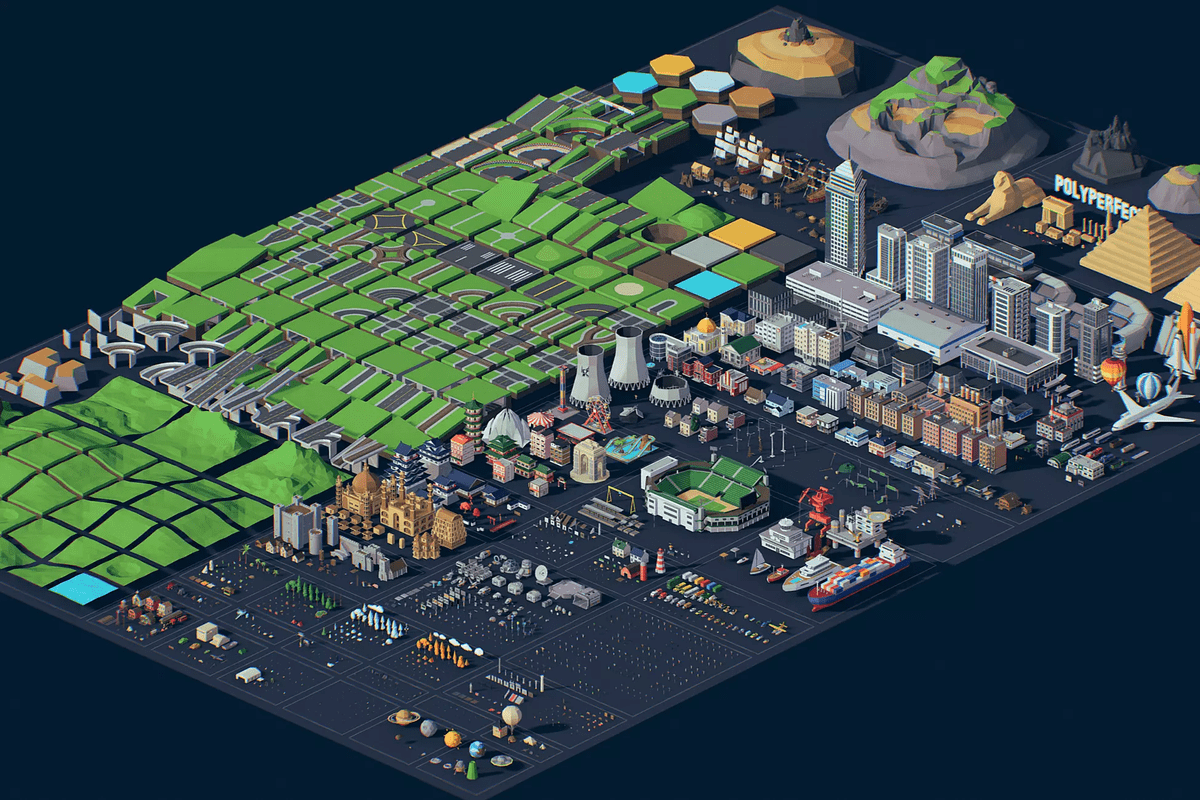
So I shelled out $80 for polyperfect's Low Poly Ultimate Pack on the Unity Asset Store:
For animation, I chose to use Mixamo: an online service that provides a set of free humanoid animations.
It's as easy as dragging your purchased 3D model into Mixamo's web application, selecting an animation, then downloading and importing that animation file into your Unity project:

polyperfect provides a helpful YouTube video to do this.
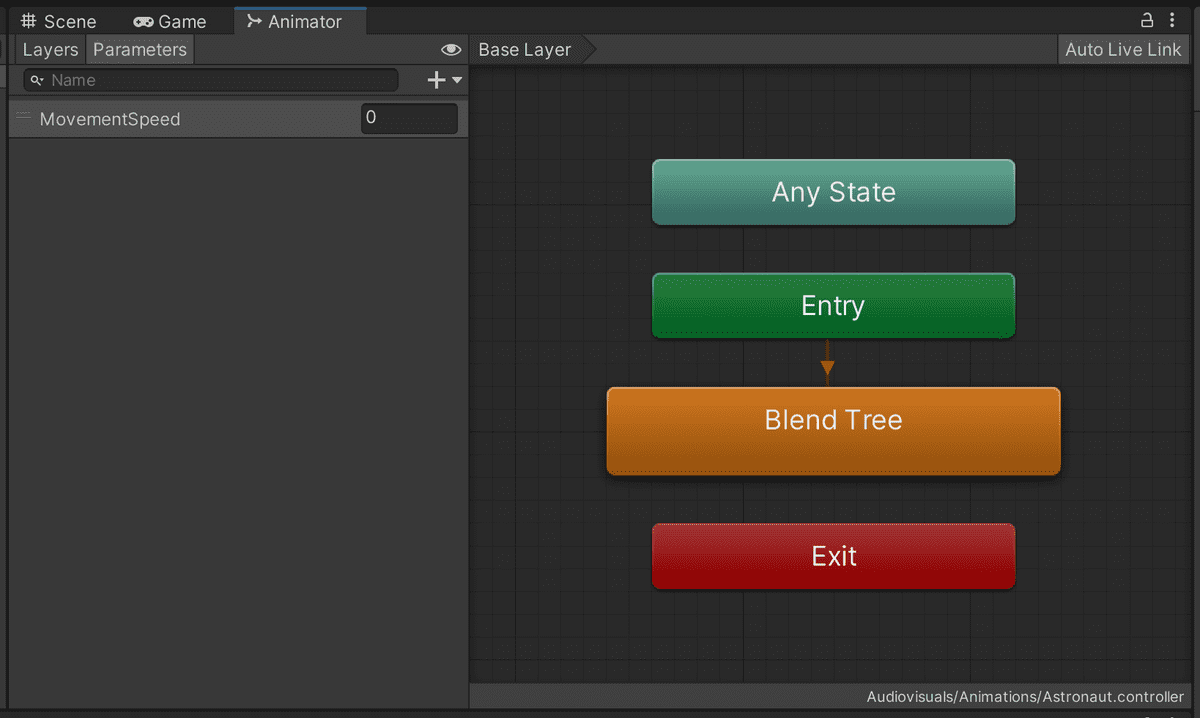
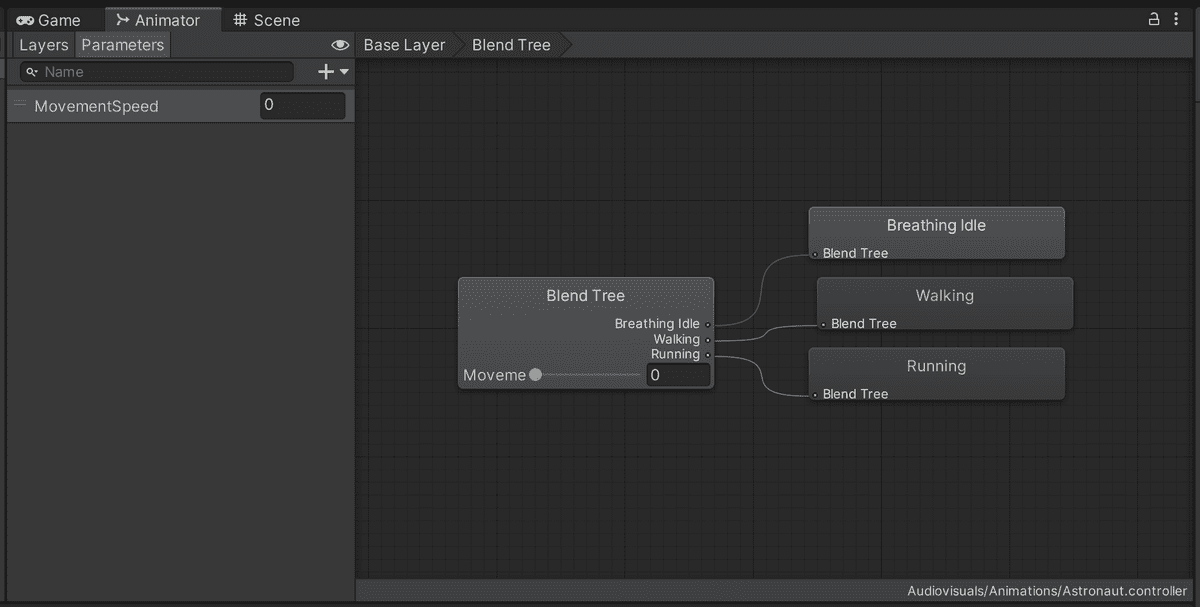
Then, using a blend tree in Mecanim (Unity's animation state machine and visual scripting language), I blended between idle, walk, and run animations based on a single MovementSpeed parameter:
And with very little time investment, I had a working and animated character controller:
There remain a few details to polish up. For example, the character looks like it's moonwalking, since a walk cycle doesn't correspond to an equivalent amount of traveled distance.
(Or maybe that can be explained away since the character is an astronaut.)
But this is a fix-able problem. And I can use Unity's Animation Rigging package to add animation detail later, such as pointing the player's head at targets of interest, or positioning the character's hands.
If you had to choose a cheap starter workflow for 3D character creation, I'd highly recommend this one.
To study the changes that implemented this initial character controller, please see the GitHub pull request.
🎥 3. How to think like a cinematographer.
Once you have a character walking and running around, the next glaring problem is the camera.
A camera fixed to one place won't do. So what can you do?
For simple games, you could code your own camera script.
But sooner or later, you might need far more dynamic camera behavior: the ability to bounce back and forth between locations, follow the player, zoom in and out, and follow pre-determined paths.
Observe the following clip from Ocarina of Time, and notice the richness of its camera behavior:
Luckily for us, we can achieve similar results with far less effort, through the power of Unity's Cinemachine package.
And by grasping its underlying concepts, you can lean on the shoulders of giants and customize your game's camera to your heart's content.
🧠 Mental models
The core metaphor for Cinemachine is that you're operating a film camera. So the entire package is couched in the language of cinematography.
Fundamentally, there are 2 core components:
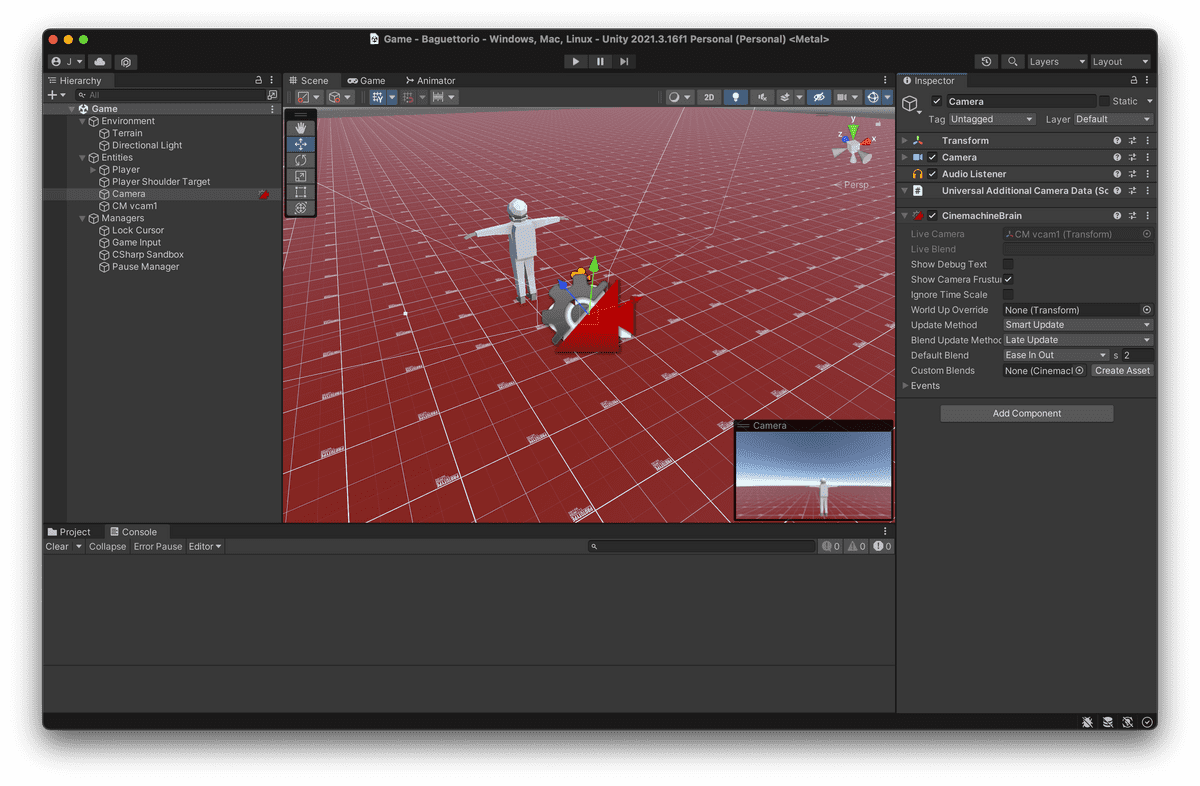
The Cinemachine Brain (attached to your
Main Camera), which takes control and overwrites your camera's values:Various "virtual" cameras, that serve as waypoints for the
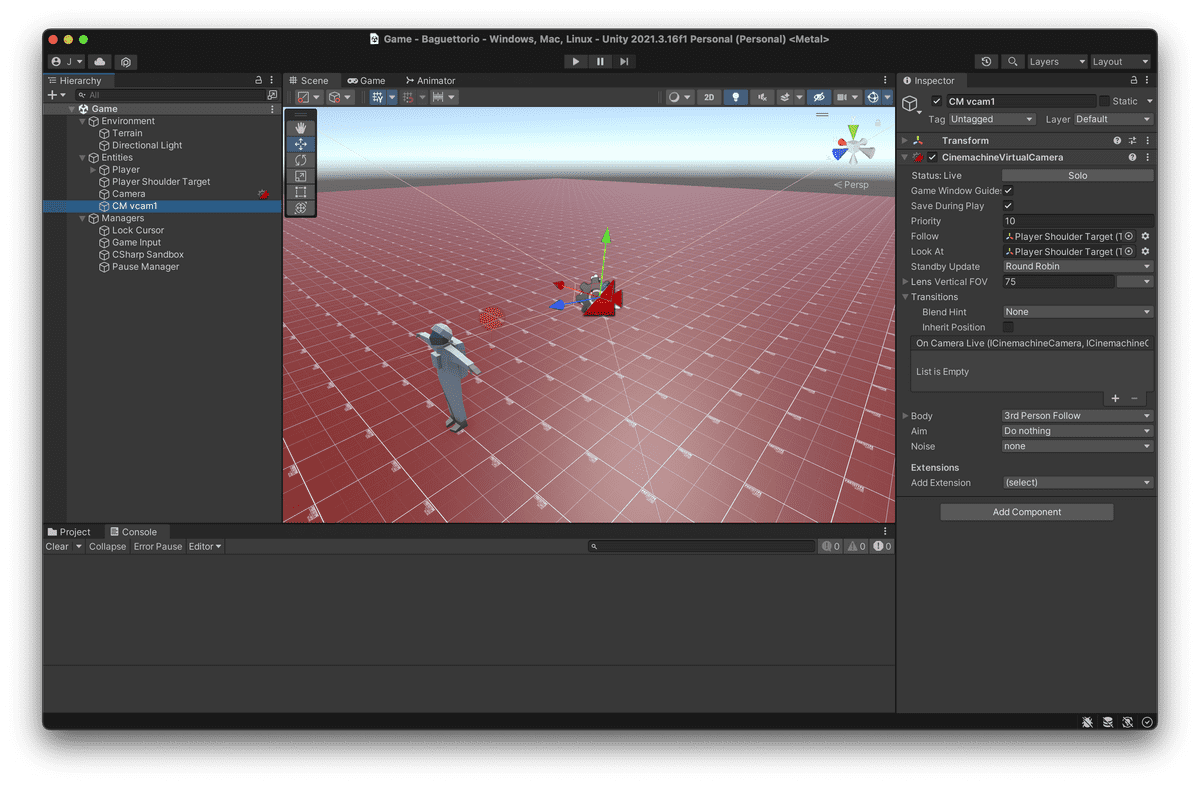
Main Camerato transition between. For my character controller's sandbox, I have a single virtual camera fixed by a rig behind the player's shoulder:
The Cinemachine documentation sums up the workflow:
- Create a Cinemachine Virtual Camera.
- Choose a GameObject to follow.
- Choose a GameObject to look at. (It may be the same as the followed object.)
- Then select camera algorithms for following and looking.
I ended up implementing a similar approach to this tutorial from Unity, where an invisible camera arm (or "rig") is stuck to the player's shoulder:
- Player Shoulder Target. I designated the player's shoulder (a separate GameObject from the player) as my virtual camera's target.
- Movement. I wrote a script to control the player's movement relative to the Player Shoulder Target's orientation.
- Shoulder rotation. I also wrote a script to rotate the shoulder target, which will indirectly rotate the camera rig.
This implementation gives a similar feel to that of Super Mario Sunshine, in that your left hand solely controls movement, and your right hand solely controls camera rotation.
For a third-person character controller, delegating camera handling to Cinemachine makes it far easier to add complex movement without having to script the behavior yourself.
To study the changes that implemented Cinemachine camera handling, please see the GitHub pull request.
🎮 4. Make your game controls rebindable.
Finally, we come to the last C in our toolkit: Controls.
In the past, one may have used the Input Manager and Input class to receive input in their game.
But doing so has one primary drawback:
If you wanted to switch between control schemes (such as Keyboard/Mouse and Gamepad), you'd need to modify your input handling. For example, you might need to define two axes for movement in the Input Manager:
Input.GetAxis("HorizontalKeyboard");
Input.GetAxis("HorizontalGamepad");
And then handle both cases whereever you process input.
Furthermore, there's zero flexibility if you want to support "rebinding" controls when playing your game. That is, the player must use your exact pre-defined device, with your exact pre-defined controls.
So how would we support rebindable controls without having to change source code?
Enter Unity's new Input System
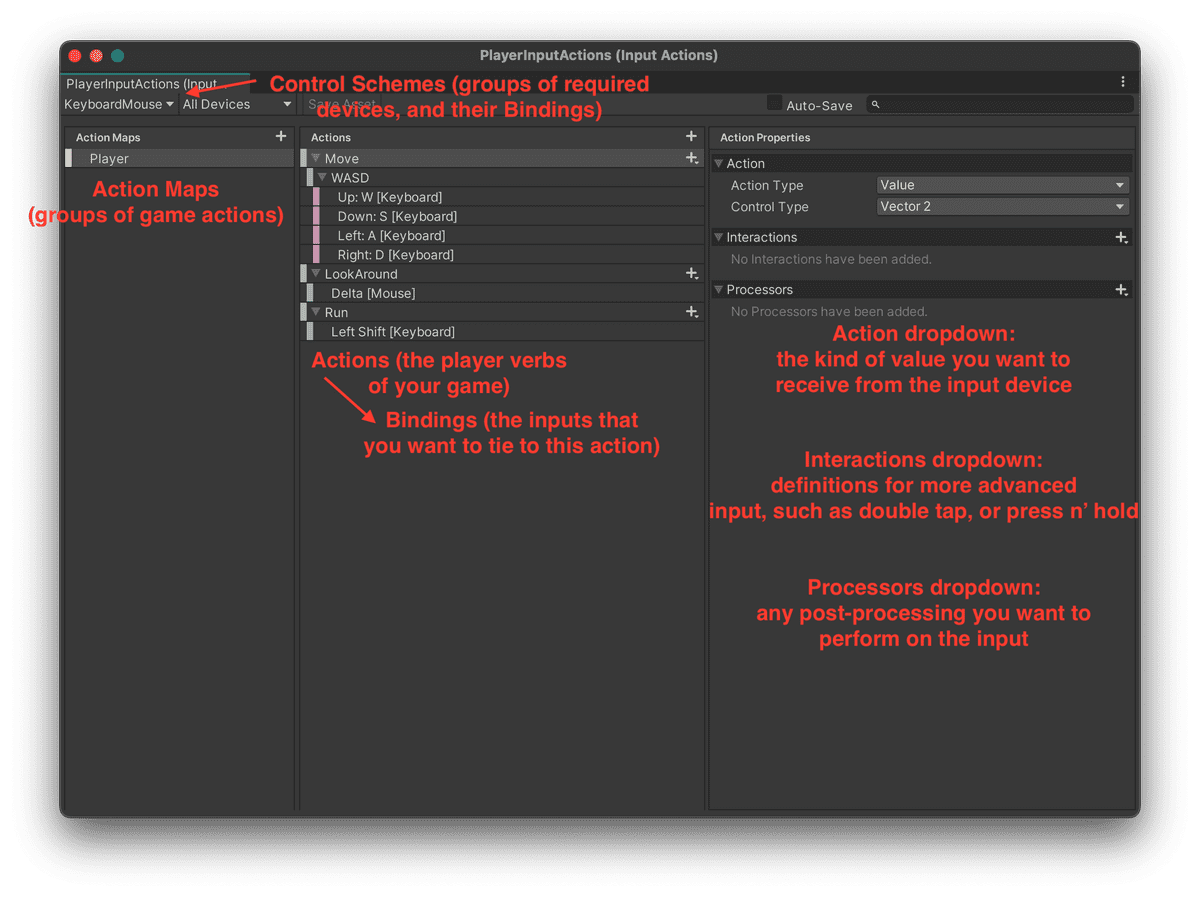
Unity's new Input System package solves this exact problem. To use it, all you need is to keep the conceptual model behind the system's Action Editor in mind:
- Actions. The player verbs of your game. Instead of relying on hard-coded inputs, actions serve as a layer of indirection to hide your inputs behind.
- Bindings. The device inputs that you want to tie to actions.
- Action Maps. Groupings of actions. For example, you might have one set of actions for player movement, and another for driving.
- Control Schemes. Groups of required devices (such as keyboard and mouse), and their corresponding bindings.
- Action Properties. Configuration for each game action so that you get the desired input value.
Using the Input System becomes as easy as reading values:
playerInputActions.Player.Move.ReadValue<Vector2>().normalized;
playerInputActions.Player.LookAround.ReadValue<Vector2>();
playerInputActions.Player.Run.IsPressed();
Or responding to events:
private void Awake()
{
    playerInputActions.Player.Pause.performed += Pause_performed;
}

private void Pause_performed(InputAction.CallbackContext context)
{
    Debug.Log("Pause button was pressed.");
}
Where the primary difference is that you are now coding against game actions instead of specific input axes or buttons. In many ways, it is the Adapter pattern for device inputs.
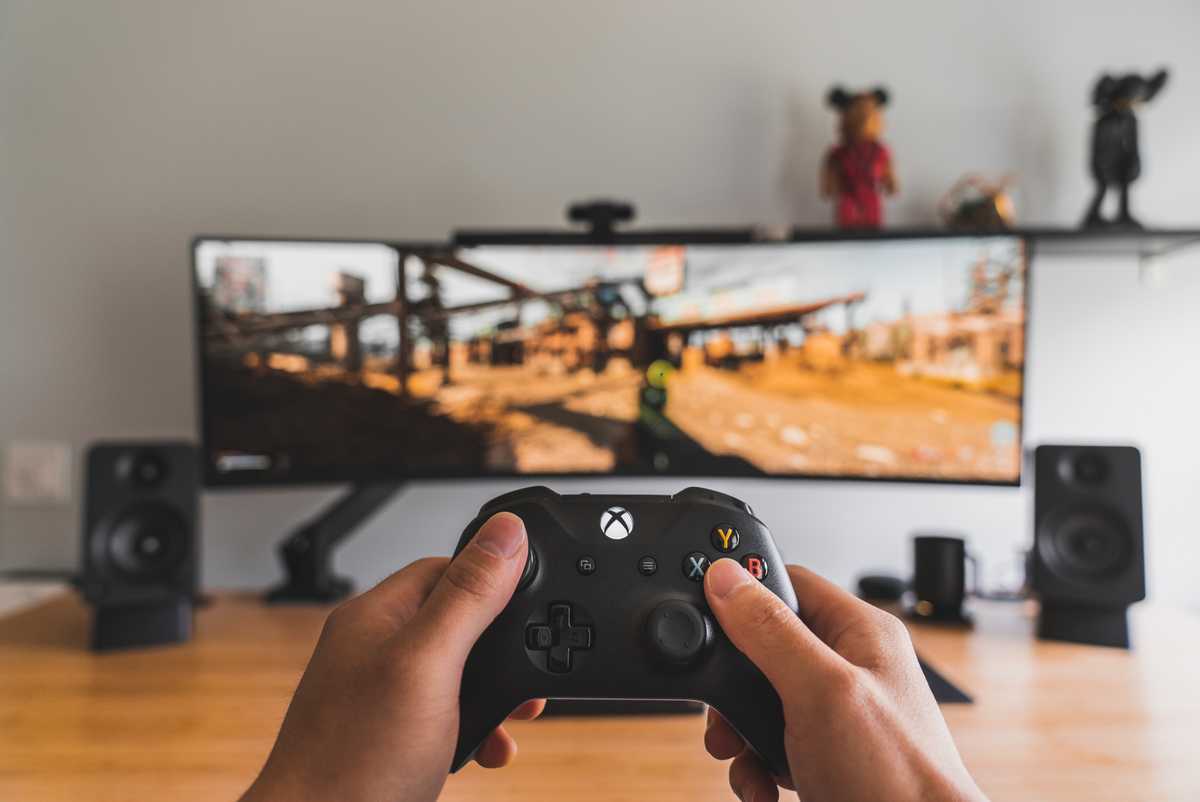
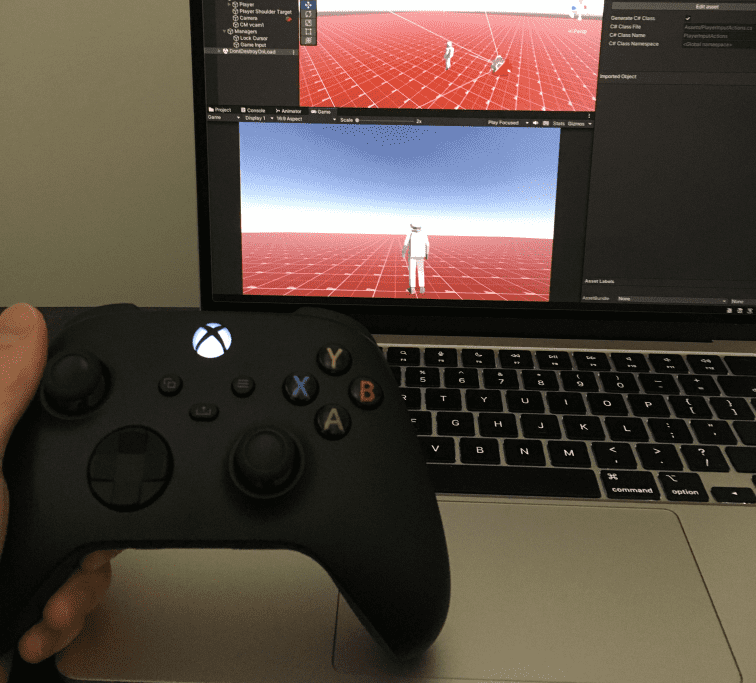
With the Input System implemented and input bindings added, you can easily connect a wireless Xbox controller (over Bluetooth) to your Unity editor, and see your game played with an actual controller:
And controlling your character with a controller makes it that much more real.
To study the changes that implemented the new Input System in an actual Unity project, please see this GitHub pull request.
👿 5. On escaping Unity tutorial hell.
In the book Ultralearning, author Scott Young defines the Directness principle of learning anything deeply:
"Go straight ahead. Learn by doing the thing you want to become good at. Don't trade it off for other tasks, just because those are more convenient or comfortable."
So what does that mean for us? It means making characters.
You now have all the tools to do so. To recap:
- Understand tradeoffs. Consider the cost, skill, expressiveness, short-term benefit, long-term benefit, and scope of your selected animation workflow.
- Use asset packs. A great way to get started with character creation is through a batteries-included asset pack combined with Mixamo’s set of humanoid animations.
- Lean on Cinemachine. You can create dynamic cameras with little effort, through the power of a CinemachineBrain that blends between multiple Cinemachine Virtual Cameras.
- Abstract your game inputs. Lean on the “Action” abstraction provided by the Input System package to easily add controller support to your game.
Armed with this overview of the process, I hope that you're now well-equipped (and inspired) to make dynamic, living 3D characters of your own.
If you make something cool, let me know! Just drop a reply in the comments below. 🙂
